
How to See WiFi Networks on Google Earth
Table of Contents
The wifi analyzer works with GPS devices to georeference 802.11 networks as well as stations (STA’s) that have been identified during the scanning process to later visualize these WiFi networks on Google Earth.
In this blog entry, we will explain how to perform a wireless capture on 802.11 networks and view the results in google earth and wireless data, including the localization of the detected devices and networks on a small project. The hardware used is the following:
- Integrated wireless card (Broadcom 43142)
- GPS device (ND-100 GPS USB DONGLE)
Configuring and starting the GPS
The first step is to access the GPS window through the configuration button (1), which opens the configuration options and we go to the GPS section (2), where we can set the configuration of our GPS device. Once defined the parameters for our GPS we select the selector (3) to start the identification of satellites.
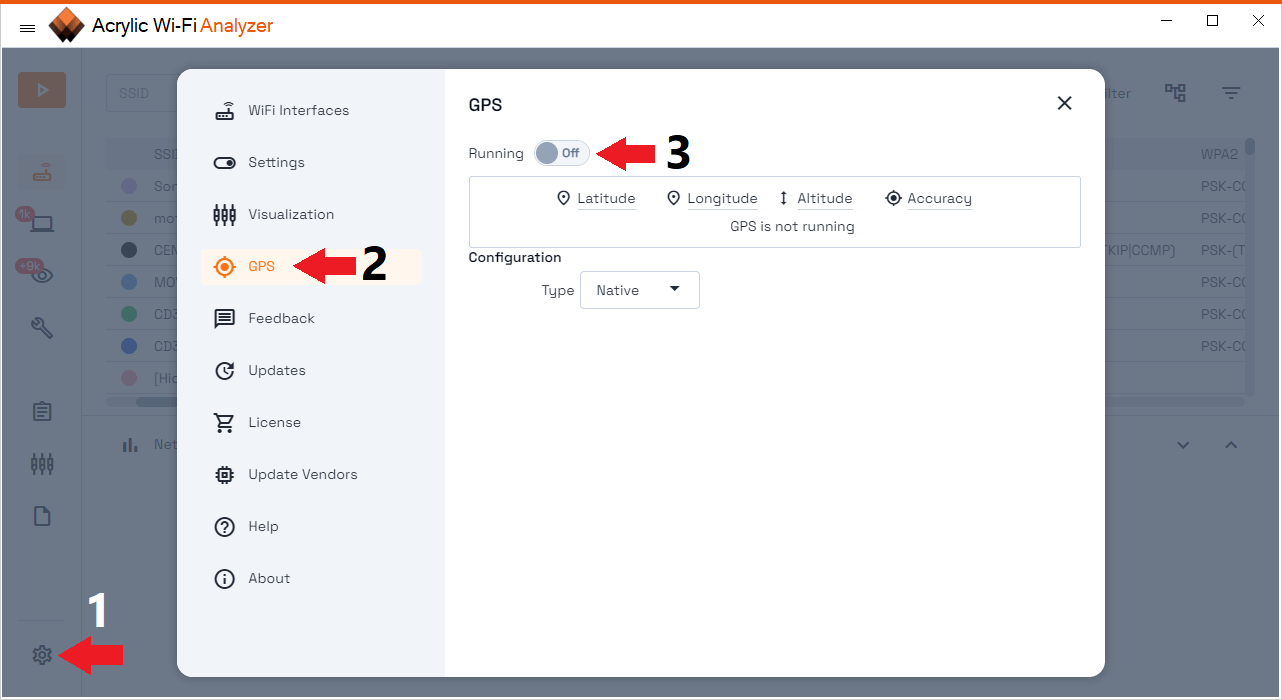
Remember that GPS does not work indoors and that it may take several minutes to obtain the latitude and longitude position.
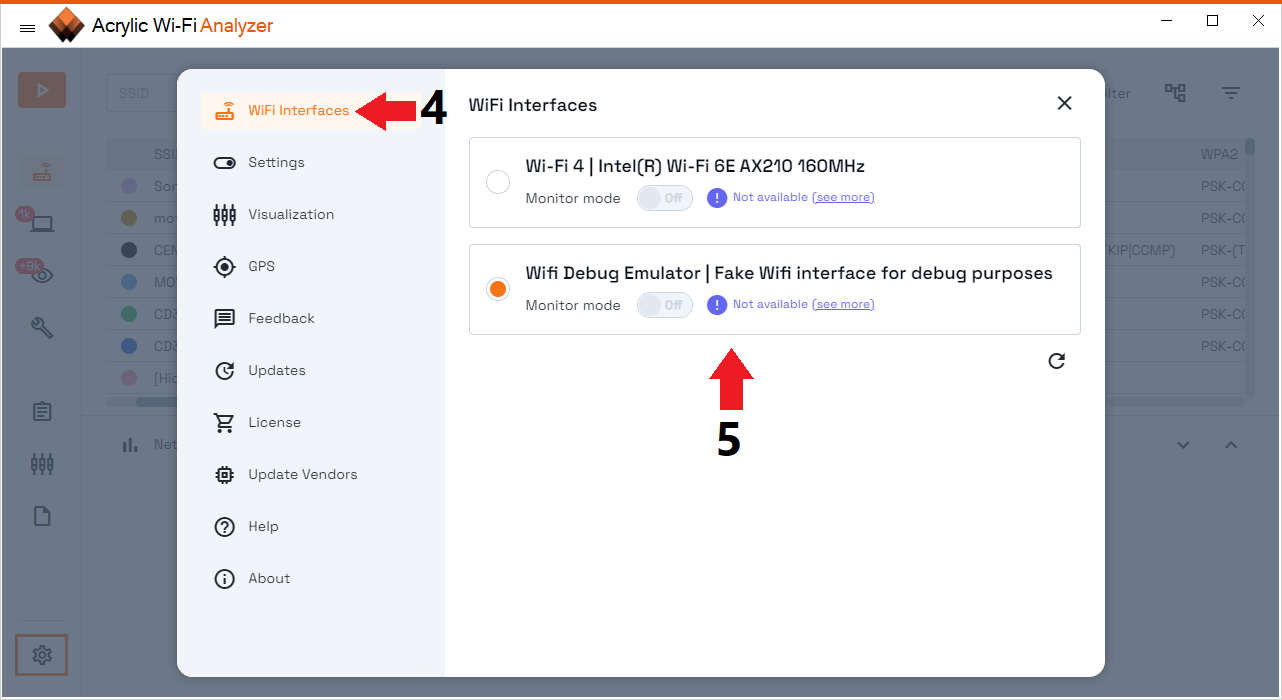
Configuring and starting WiFi capture
Once the GPS device is configured and our position is identified, we can start identifying 802.11 networks and devices by starting a capture.
To do this we will go to the wifi devices section (4) and select the interface we want to use (5), close the configuration and start the capture normally with the “Play” button in the upper left corner. The use of GPS is a prerequisite to be able to visualize WiFi networks in Google Earth.
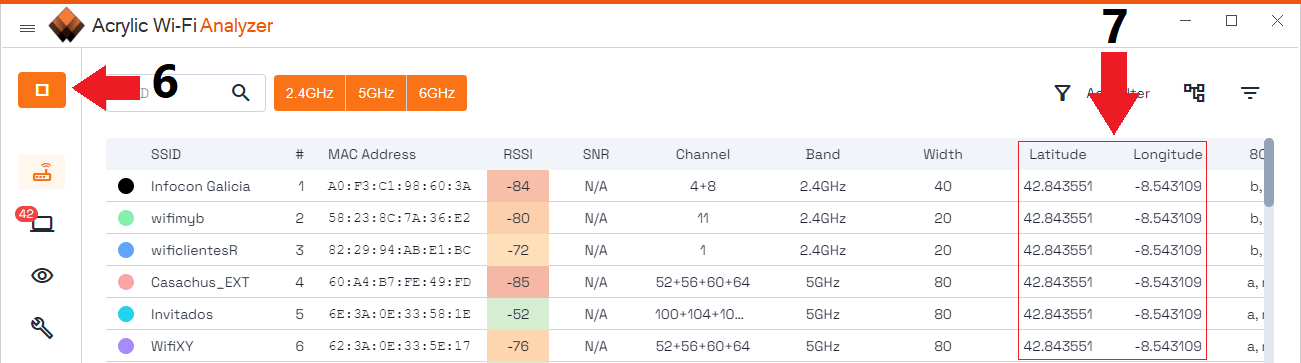
Display the geopositioned APs.
As the networks are identified, the last location where the access point was detected will be displayed, both for networks and devices. When the path is completed, select the “Stop” button (6) to end the capture. This is necessary to be able to view them later on google earth and wireless data.
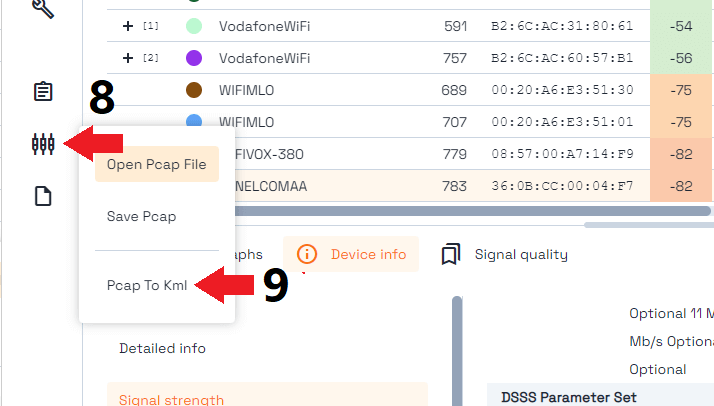
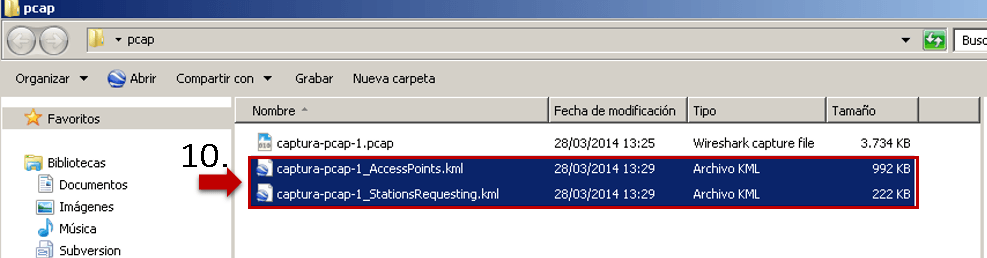
Generate a KML with the geopositioned APs
With the functionality that allows the conversion of pcap captures to KML we will be able to transform the data captured with GPS into a KML file understood by the GIS tools. This tool is accessible through the “PCAP” options menu (8) and selecting the “Pcap to KML” option (9).
How to Load a KML File with WiFi Networks on Google Earth
The WiFi capture file conversion process will generate two KML files, one containing the identified networks, and the other one including the detected stations (STA’s).
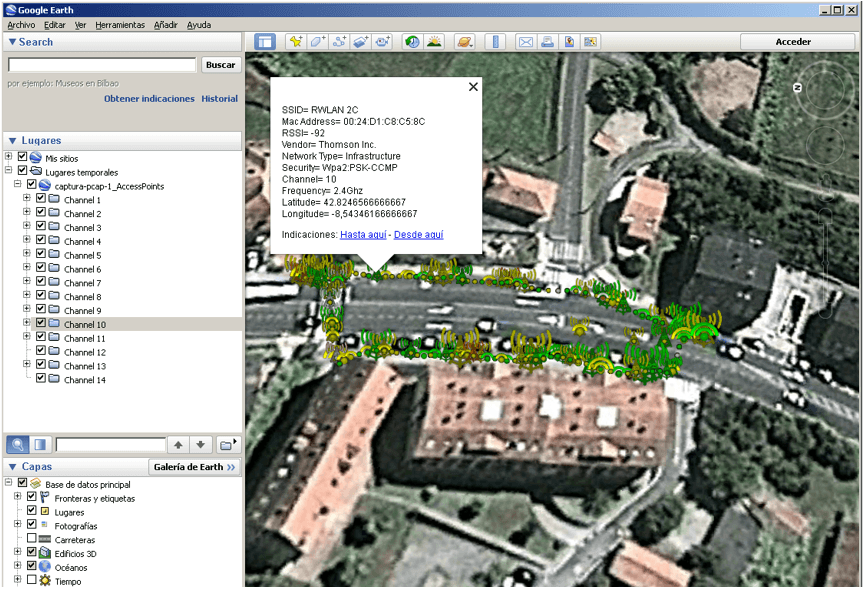
Finally, we will be able to open the KML capture file that includes the access points identified during the capture process using Google Earth to visualize the locations where wireless networks have been detected, including information such as SSID, network type, security type, signal strength, and channel.
Download Acrylic WiFi Analyzer and start monitoring your WiFi networks and become a WLAN Pro viewing the wireless data on Google Earth.